Alert settings are found on the sensor settings page in the app. To access sensor settings, tap a sensor in the main list and then tap the button in the upper-right corner of the sensor details page.
There you'll see each sensor parameters listed (e.g. Temperature, Relative Humidity, etc). Each parameter has a High Limit setting, a Low Limit setting, and an "Alert Me" toggle switch. These controls make it possible to set maximum and minimum limits, and to enable alerts based on those limits.
EXAMPLE 1: SETTING TEMPERATURE LIMITS AND ALERTS
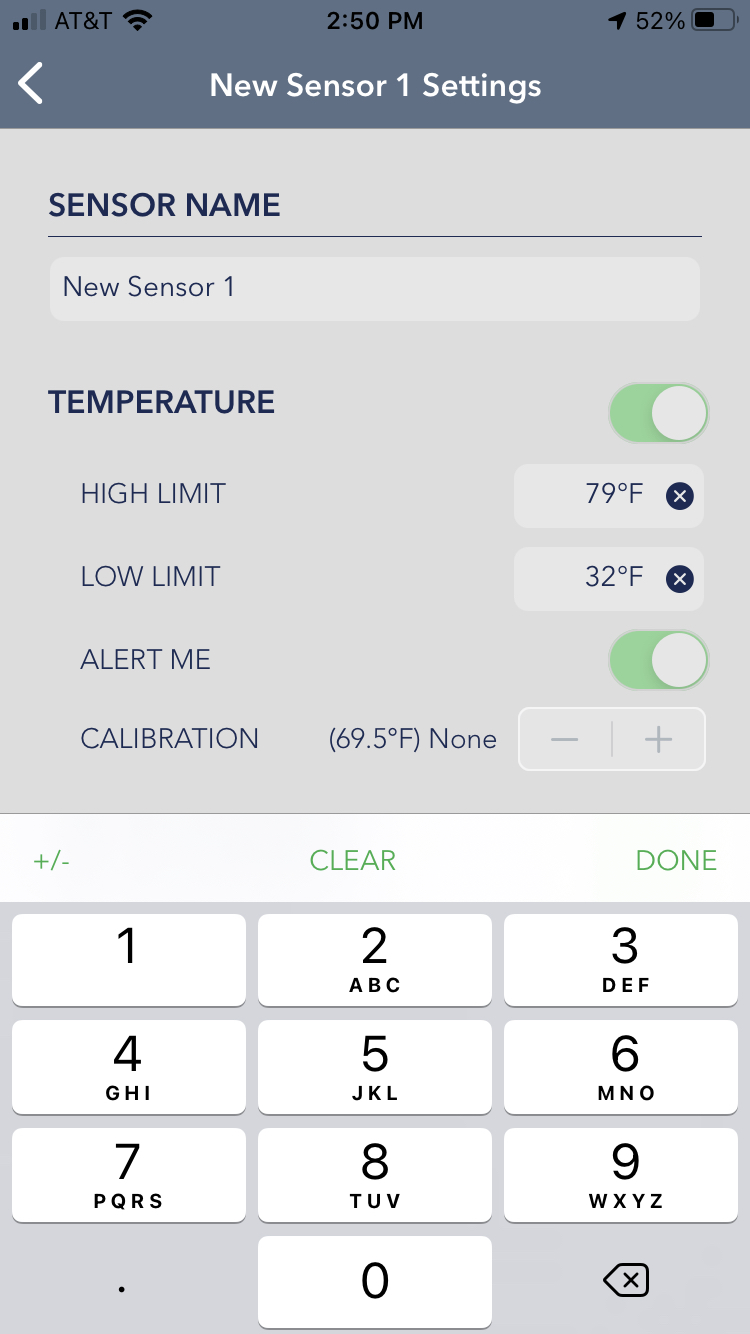
In the screen shot example below, we have entered 79°F as a high limit (the maximum Temperature). Also in the screen shot, we have entered 32°F as a low limit (the minimum Temperature).
In order to set one of these limits for temperature, you tap the text field box to the right of the words "High Limit" or "Low Limit" and a keypad will pop up. Use the keypad to enter the number for the temperature limit. There is an option above the calculator for +/- to enter a negative value.
Also in this screenshot, notice that the "Alert Me" toggle switch is enabled. This toggle switch means you'll be notified whenever conditions leave this zone. Alerts are sent using notifications, which is the same technology news companies employ to send out breaking news alerts.
Back on the home screen (shown below), you will now see the high limit and low limit areas shaded to the right of the current Temperature reading. The shading (slanted lines) cover the areas below the low limit and above the high limit.
The shading does not, however, indicate that the "Alert Me" toggle switch is ON, so be sure to double check that the switch is ON if you wish to receive alerts.
If the "Alert Me" switch is ON, and the Temperature crosses a threshold going above or below a high or low limit, an alert is triggered.
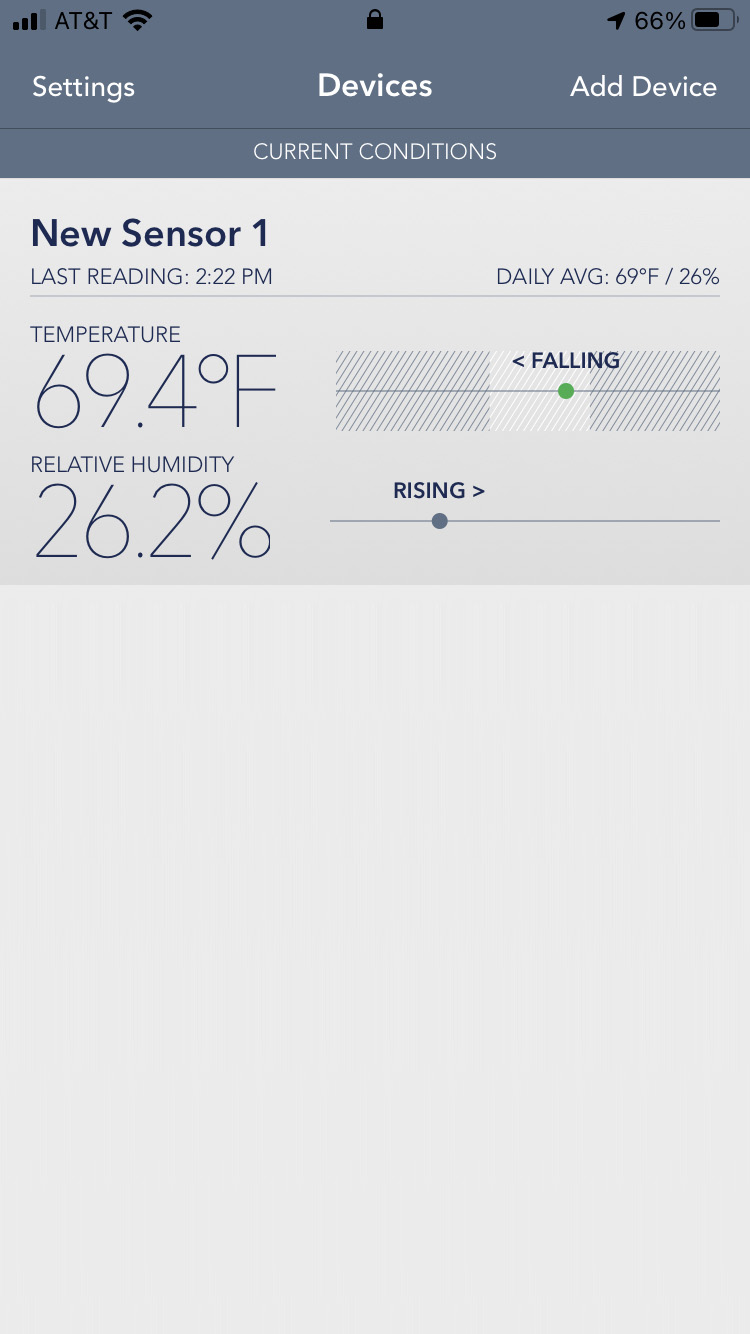
Also note in the above image, there are no shaded areas for a high limit or low limit for Relative Humidity. These are not yet set, but we do this in the next example.
EXAMPLE 2: SETTING RELATIVE HUMIDITY LIMITS AND ALERTS
The screen shot below is the same screen in the app where we set a high and low limit for Temperature, but it is scrolled down a bit so we can enter a high and low limit for Relative Humidity. The controls work in exactly the same way as with setting limits for Temperature. Tap the text field box to the right of the words "High Limit" or "Low Limit" and use the keypad that pops up to set the high or low limit.
In the example below, the high limit (the maximum level of Relative Humidity) is set to 60% and the low limit is set to 40% (the minimum level of Relative Humidity).
Also in the image below, you can see that the "Alert Me" toggle switch is ON in order to get notified by an alert when the Relative Humidity goes above 60% RH or below 40% RH.

Back on the home screen (shown below), you will now see the high limit and low limit areas shaded to the right of both the current Temperature reading and also the current Relative Humidity reading. The shading (slanted lines) cover the areas below the low limit and above the high limit. And again, note that these shaded areas do not indicate whether the "Alert Me" toggle switch is ON, so be sure to double check that the switch is ON if you wish to receive alerts.
One important difference between Temperature and Relative Humidity in the screenshot below is that the current Relative Humidity reading is BELOW the limit that was set.
Important: If the current conditions were already below or above the limits during the time while you were setting those limits, you will not get alerted until both 1.) the conditions return to normal, and 2.) the conditions cross the threshold going above or below either the high or low limit.

OTHER LIMITS AND ALERTS
There are parameters other than Temperature and Relative Humidity (e.g. Dew Point), but the process for how to set high and low limits for those parameters works the same way. Reach out to support@sensorpush.com if you have any additional questions.
![]()